LUMI Software Stacks
In this part of the training, we cover:
- Software stacks on LUMI, where we discuss the organisation of the software stacks that we offer and some of the policies surrounding it
- Advanced Lmod use to make the best out of the software stacks
- Creating your customised environment with EasyBuild, the tool that we use to install most software.
The software stacks on LUMI
Design considerations
-
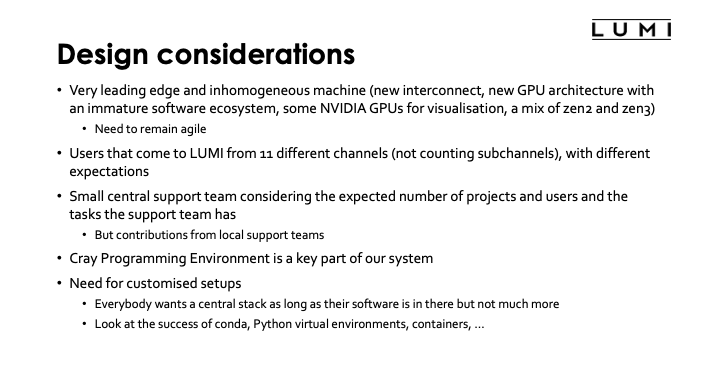
LUMI is a very leading edge and also an inhomogeneous machine. Leading edge often implies teething problems and inhomogeneous doesn't make life easier either.
- It uses a novel interconnect which is an extension of Ethernet rather than being based on InfiniBand, and that interconnect has a different software stack of your typical Mellanox InfiniBand cluster.
- It also uses a relatively new GPU architecture, AMD CDNA2, with an immature software ecosystem. The GPU nodes are really GPU-first, with the interconnect cards connected directly to the GPU packages and only one CPU socket, and another feature which is relatively new: a fully cache-coherent unified memory space between the CPU and GPUs, though of course very NUMA. This is a feature that has previously only been seen in some clusters with NVIDIA P100 and V100 GPUs and IBM Power 8 and 9 CPUs used for some USA pre-exascale systems, and of course in the Apple M1 but then without the NUMA character.
- LUMI is also inhomogeneous because some nodes have zen2 processors while the two main compute partitions have zen3-based CPUs, and the compute GPU nodes have AMD GPUs while the visualisation nodes have NVIDIA GPUs.
Given the novel interconnect and GPU we do expect that both system and application software will be immature at first and evolve quickly, hence we needed a setup that enables us to remain very agile, which leads to different compromises compared to a software stack for a more conventional and mature system as an x86 cluster with NVIDIA GPUs and Mellanox InfiniBand.
-
Users also come to LUMI from 11 different channels, not counting subchannels as some countries have multiple organisations managing allocations, and those channels all have different expectations about what LUMI should be and what kind of users should be served. For our major stakeholder, the EuroHPC JU, LUMI is a pre-exascale system meant to prepare users and applications to make use of future even large systems, while some of the LUMI consortium countries see LUMI more as an extension of their tier-1 or even tier-2 machines.
-
The central support team of LUMI is also relatively small compared to the nature of LUMI with its many different partitions and storage services and the expected number of projects and users. Support from users coming in via the national channels will rely a lot on efforts from local organisations also. So we must set up a system so that they can support their users without breaking things on LUMI, and to work with restricted rights. And in fact, LUMI User Support team members also have very limited additional rights on the machine compared to regular users or support people from the local organisations. LUST is currently 9 FTE. Compare this to 41 people in the Jülich Supercomputer Centre for software installation and support only... (I give this number because it was mentioned in a recent talk in an EasyBuild user meeting.)
-
The Cray Programming Environment is also a key part of LUMI and the environment for which we get support from HPE Cray. It is however different from more traditional environments such as a typical Intel oneAPI installation of a typical installation build around the GNU Compiler Collection and Open MPI or MPICH. The programming environment is installed with the operating system rather than through the user application software stack hence not managed through the tools used for the application software stack, and it also works differently with its universal compiler wrappers that are typically configured through modules.
-
We also see an increasing need for customised setups. Everybody wants a central stack as long as their software is in there but not much more as otherwise it is hard to find, and as long as software is configured in the way they are used to. And everybody would like LUMI to look as much as possible as their home system. But this is of course impossible. Moreover, there are more and more conflicts between software packages and modules are only a partial solution to this problem. The success of containers, conda and Python virtual environments is certainly to some extent explained by the need for more customised setups and the need for multiple setups as it has become nearly impossible to combine everything in a single setup due to conflicts between packages and the dependencies they need.
The LUMI solution
We tried to take all these considerations into account and came up with a solution that may look a little unconventional to many users.
In principle there should be a high degree of compatibility between releases of the HPE Cray Programming Environment but we decided not to take the risk and build our software for a specific release of the programming environment, which is also a better fit with the typical tools used to manage a scientific software stack such as EasyBuild and Spack as they also prefer precise versions for all dependencies and compilers etc. We also made the stack very easy to extend. So we have many base libraries and some packages already pre-installed but also provide an easy and very transparant way to install additional packages in your project space in exactly the same way as we do for the central stack, with the same performance but the benefit that the installation can be customised more easily to the needs of your project. Not everybody needs the same configuration of GROMACS or LAMMPS or other big packages, and in fact a one-configuration-that-works-for-everybody may even be completely impossible due to conflicting options that cannot be used together.
For the module system we could chose between two systems supported by HPE Cray. They support Environment Modules with module files based on the TCL scripting language, but only the old version that is no longer really developed and not the newer versions 4 and 5 developed in France, and Lmod, a module system based on the LUA scripting language that also support many TCL module files through a translation layer. We chose to go with Lmod as LUA is an easier and more modern language to work with and as Lmod is much more powerful than Environment Modules 3, certainly for searching modules.
To manage the software installations we could chose between EasyBuild, which is mostly developed in Europe and hence a good match with a EuroHPC project as EuroHPC wants to develop a European HPC technology stack from hardware to application software, and Spack, a package developed in the USA national labs. We chose to go with EasyBuild as our primary tool for which we also do some development. However, as we shall see, our EasyBuild installation is not your typical EasyBuild installation that you may be acustomed with from clusters at your home institution. It uses toolchains specifically for the HPE Cray programming environment so recipes need to be adapted. We do offer an growing library of Cray-specific installation recipes though. The whole setup of EasyBuild is done such that you can build on top of the central software stack and such that your modules appear in your module view without having to add directories by hand to environment variables etc. You only need to point to the place where you want to install software for your project as we cannot automatically determine a suitable place. We have a pre-configured Spack installation also but do not do any package development in Spack ourselves. The setup is meant for users familiar with Spack who can also solve problems that occur on the road, but we already did the work of ensuring that Spack is correctly configured for the HPE Cray compilers.
Software policies
As any site, we also have a number of policies about software installation, and we're still further developing them as we gain experience in what we can do with the amount of people we have and what we cannot do.
LUMI uses a bring-your-on-license model except for a selection of tools that are useful to a larger community.
- This is partly caused by the distributed user management as we do not even have the necessary information to determine if a particular user can use a particular license, so we must shift that responsibility to people who have that information, which is often the PI of your project.
- You also have to take into account that up to 20% of LUMI is reserved for industry use which makes negotiations with software vendors rather difficult as they will want to push us onto the industrial rather than academic pricing as they have no guarantee that we will obey to the academic license restrictions.
- And lastly, we don't have an infinite budget. There was a questionaire send out to some groups even before the support team was assembled and that contained a number of packages that by themselves would likely consume our whole software budget for a single package if I look at the size of the company that produces the package and the potential size of their industrial market. So we'd have to make choices and with any choice for a very specialised package you favour a few groups. And there is also a political problem as without doubt the EuroHPC JU would prefer that we invest in packages that are developed by European companies or at least have large development teams in Europe.
The LUMI User Support Team tries to help with installations of recent software but porting or bug correction in software is not our task. As a user, you have to realise that not all Linux or even supercomputer software will work on LUMI. This holds even more for software that comes only as a binary. The biggest problems are the GPU and anything that uses distributed memory and requires high performance from the interconnect. For example,
- software that use NVIDIA proprietary programming models and libraries needs to be ported.
- Binaries that do only contain NVIDIA code paths, even if the programming model is supported on AMD GPUs, will not run on LUMI.
- The final LUMI interconnect requires libfabric using a specific provider for the NIC used on LUMI, so any software compiled with an MPI library that requires UCX, or any other distributed memory model build on top of UCX, will not work on LUMI, or at least not work efficiently as there might be a fallback path to TCP communications.
- Even intro-node interprocess communication can already cause problems as there are three different kernel extensions that provide more efficient interprocess messaging than the standard Linux mechanism. Many clusters use knem for that but on LUMI xpmem is used. So software that is not build to support xpmem will also fall back to the default mechanism or fail.
- Also, the MPI implementation needs to collaborate with certain modules in our Slurm installation to start correctly and experience has shown that this can also be a source of trouble as the fallback mechanisms that are often used do not work on LUMI.
- Containers solve none of these problems. There can be more subtle compatibility problems also. As has been discussed earlier in the course, LUMI runs SUSE Linux and not Ubuntu which is popular on workstations or a Red Hat-derived Linux popular on many clusters. Subtle differences between Linux versions can cause compatibility problems that in some cases can be solved with containers. But containers won't help you if they are build for different kernel extensions, driver versions and hardware interfaces.
- The compute nodes also lack some Linux daemons that may be present on smaller clusters. HPE Cray use an optimised Linux version called COS or Cray Operating System on the compute nodes. It is optimised to reduce OS jitter and hence to enhance scalability of applications as that is after all the primary goal of a pre-exascale machine. But that implies that certain Linux daemons that your software may expect to find are not present on the compute nodes. D-bus comes to mind.
Also, the LUNI user support team is too small to do all software installations which is why we currently state in our policy that a LUMI user should be capable of installing their software themselves or have another support channel. We cannot install every single piece of often badly documented research-quality code that was never meant to be used by people who don't understand the code.
Another soft compatibility problem that has not yet been mentioned is that software that accesses hundreds
of thousands of small files and abuses the file system as a database rather than using structured
data formats designed to organise data on supercomputers is not welcome on LUMI. For that reason we
also require to containerize conda and Python installations. We do offer a container-based wrapper
that offers a way to install conda packages or to install Python packages with pip on top of
the Python provided by the cray-python module. The link to the documentation of the tool that we call
lumi-container-wrapper
but may by some from CSC also be known as Tykky is in the handout of the slides that you can get
after the course.
Organisation of the software in software stacks
On LUMI we have several software stacks.
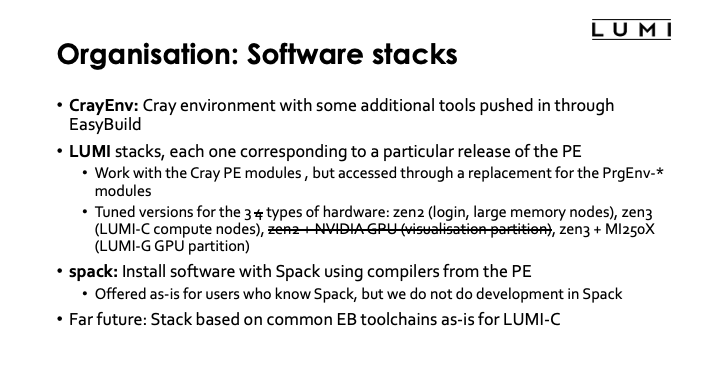
CrayEnv is the software stack for users who only need the Cray Programming Environment but want a more recent set of build tools etc than the OS provides. We also take care of a few issues that we will discuss on the next slide that are present right after login on LUMI.
Next we have the stacks called "LUMI". Each one corresponds to a particular release of the HPE Cray Programming Environment. It is the stack in which we install software using the that programming environment and mostly EasyBuild. The Cray Programming Environment modules are still used, but they are accessed through a replacement for the PrgEnv modules that is managed by EasyBuild. We have tuned versions for the 4 types of hardware in the regular LUMI system: zen2 CPUs in the login nodes and large memory nodes, zen3 for the LUMI-C compute nodes, zen 2 combined with NVIDIA GPUs for the visualisation nodes and zen3 + MI250X for the LUMI-G partition. There is also some support for the early access platform which has zen2 CPUs combined with MI100 GPUs but we don't pre-install software in there at the moment except for some build tools and some necessary tools for ROCm as these nodes are not meant to run codes on and as due to installation restrictions we cannot yet use the GPU compilers with EasyBuild the way we should do that on the final system.
We also provide the spack modules which provide some support to install software with Spack. This stack is meant for users who are very familiar with Spack and can deal with the problems Spack may throw at you. We have no intent to debug or modify Spack package files ourselves, but did an effort to configure Spack to use the compilers provided by the HPE Cray PE.
In the far future we will also look at a stack based on the common EasyBuild toolchains as-is, but we do expect problems with MPI that will make this difficult to implement, and the common toolchains also do not yet support the AMD GPU ecosystem, so we make no promises whatsoever about a time frame for this development.
3 ways to access the Cray Programming environment on LUMI.
Bare environment and CrayEnv
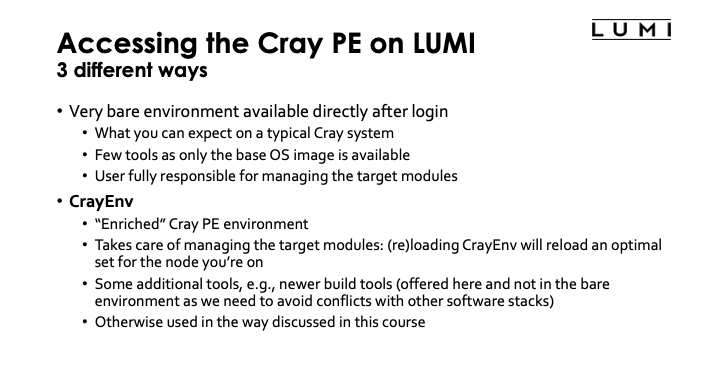
Right after login you have a very bare environment available with the Cray Programming Environment with the PrgEnv-cray module loaded. It gives you basically what you can expect on a typical Cray system. There aren't many tools available, basically mostly only the tools in the base OS image and some tools that we are sure will not impact software installed in one of the software stacks. The set of target modules loaded is the one for the login nodes and not tuned to any particular node type. As a user you're fully responsible for managing the target modules, reloading them when needed or loading the appropriate set for the hardware you're using or want to cross-compile for.
The second way to access the Cray Programming Environment is through the CrayEnv software stack. This stack offers an "enriched" version of the Cray environment. It takes care of the target modules: Loading or reloading CrayEnv will reload an optimal set of target modules for the node you're on. It also provides some additional tools like newer build tools than provided with the OS. They are offered here and not in the bare environment to be sure that those tools don't create conflicts with software in other stacks. But otherwise the Cray Programming Environment works exactly as you'd expect from this course.
LUMI stack
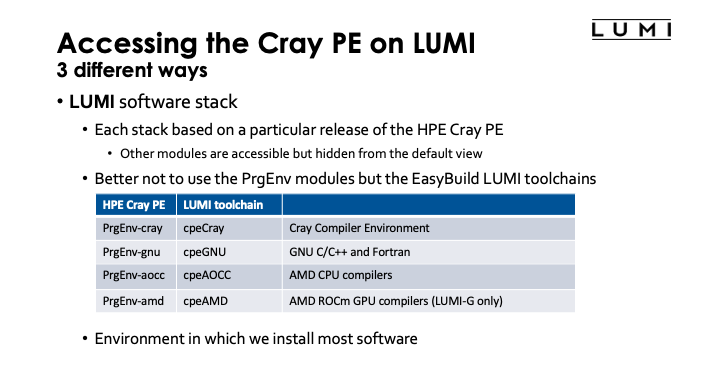
The third way to access the Cray Programming Environment is through the LUMI software stacks, where each stack is based on a particular release of the HPE Cray Programming Environment. We advise against mixing with modules that came with other versions of the Cray PE, but they remain accessible although they are hidden from the default view for regular users. It ia also better to not use the PrgEnv modules, but the equivalent LUMI EasyBuild toolchains instead as indicated by the following table:
| HPE Cray PE | LUMI toolchain | What? |
|---|---|---|
PrgEnv-cray |
cpeCray |
Cray Compiler Environment |
PrgEnv-gnu |
cpeGNU |
GNU C/C++ and Fortran |
PrgEnv-aocc |
cpeAOCC |
AMD CPU compilers |
PrgEnv-amd |
cpeAMD |
AMD ROCm GPU compilers (LUMI-G only) |
The cpeCray etc modules also load the MPI libraries and Cray LibSci just as the PrgEnv modules do.
And we sometimes use this to work around problems in Cray-provided modules that we cannot change. E.g.,
the PrgEnv-aocc/21.12 module can successfully use the aocc/3.1.0 compilers.
This is also the environment in which we install most software, and from the name of the modules you can see which compilers we used.
LUMI stack module organisation

To manage the heterogeneity in the hardware, the LUMI software stack uses two levels of modules
First there are the LUMI/21.12 and LUMI/22.08 modules. Each of the LUMI modules loads a particular version of the LUMI stack.
The second level consists of partition modules. There is partition/L for the login and large memory nodes, partition/C for the regular compute nodes, partition/G for the GPU nodes and in the future we may have partition/D for the visualisation nodes.
There is also a hidden partition/common module in which we install software that is available everywhere, but we advise you to be careful to install software in there in your own installs as it is risky to rely on software in one of the regular partitions, and impossible in our EasyBuild setup.
The LUMI module will automatically load the best partition module for the current hardware whenever it is loaded or reloaded. So if you want to cross-compile, you can do so by loading a different partition module after loading the LUMI module, but you'll have to reload every time you reload the LUMI module.
Hence you should also be very careful in your job scripts. On LUMI the environment from the login nodes is used when your job starts, so unless you switched to the suitable partition for the compute nodes, your job will start with the software stack for the login nodes. If in your job script you reload the LUMI module it will instead switch to the software stack that corresponds to the type of compute node you're using and more optimised binaries can be available. If for some reason you'd like to use the same software on LUMI-C and on the login or large memory nodes and don't want two copies of locally installed software, you'll have to make sure that after reloading the LUMI module in your job script you explicitly load the partition/L module.
Lmod on LUMI
Exploring modules with Lmod
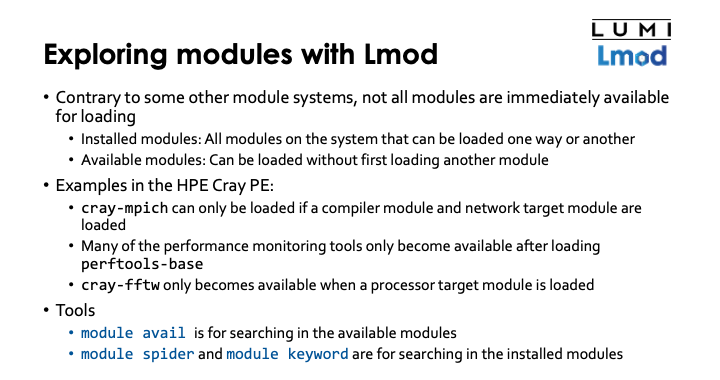
Contrary to some other module systems, or even some other Lmod installations, not all modules are
immediately available for loading. So don't be disappointed by the small number of modules you will see with
module available right after login. Lmod has a so-called hierarchical setup that tries to protect
you from being confronted with all modules at the same time, even those that may conflict with
each other, and we use that to some extent on LUMI. Lmod distinguishes between installed modules and
available modules. Installed modules are all modules on the system that can be loaded one way or
another, sometimes through loading other modules first. Available modules are all those modules
that can be loaded at a given point in time without first loading other modules.
The HPE Cray Programming Environment also uses a hierarchy though it is not fully implemented in the way the Lmod developer intended so that some features do not function as they should.
- For example, the
cray-mpichmodule can only be loaded if both a network target module and a compiler module are loaded (and that is already the example that is implemented differently from what the Lmod developer had in mind). - Another example is the performance monitoring tools. Many of those
tools only become available after loading the
perftools-basemodule. - Another example is the
cray-fftwmodule which requires a processor target module to be loaded first.
Lmod has several tools to search for modules.
- The
module availcommand is one that is also present in the various Environment Modules implementations and is the command to search in the available modules. - But Lmod also has other commands,
module spiderandmodule keyword, to search in the list of installed modules.
Module spider command
Demo moment 1 (when infrastructure for a demo is available)
(The content of this slide is really meant to be shown in practice on a command line.)
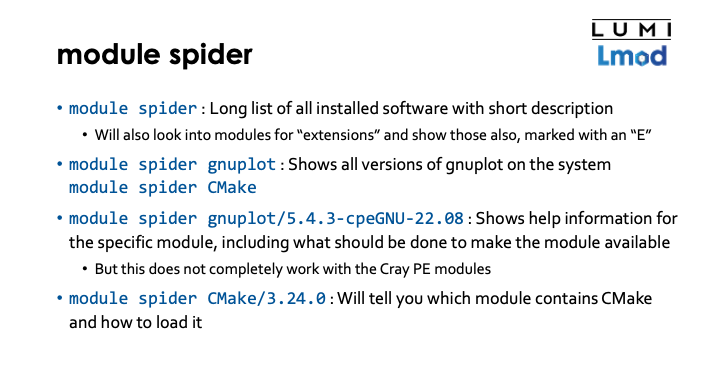
There are three ways to use module spider, discovering software in more and more detail.
-
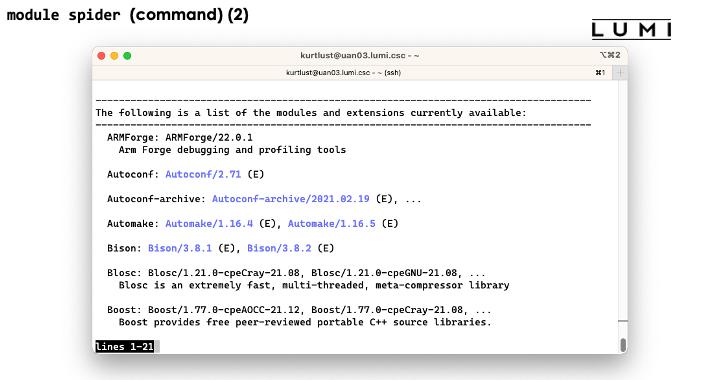
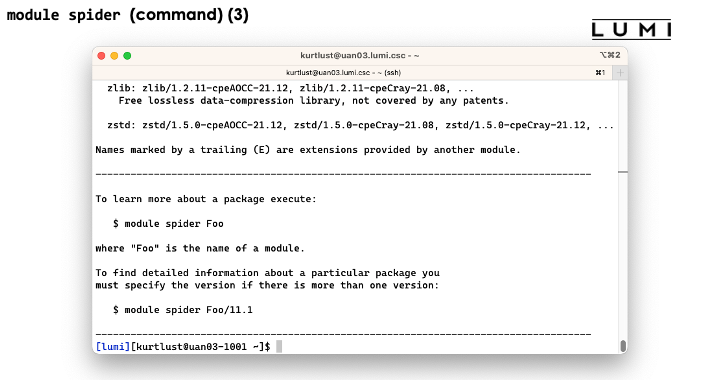
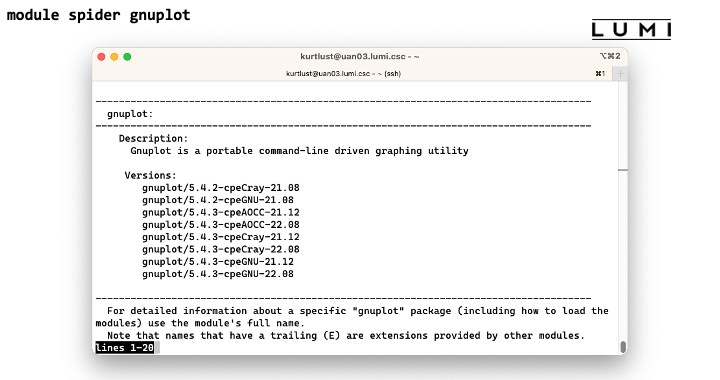
module spiderby itself will show a list of all installed software with a short description. Software is bundled by name of the module, and it shows the description taken from the default version.module spiderwill also look for "extensions" defined in a module and show those also and mark them with an "E". Extensions are a useful Lmod feature to make clear that a module offers features that one would not expect from its name. E.g., in a Python module the extensions could be a list of major Python packages installed in the module which would allow you to findNumPyif it were hidden in a module with a different name. This is also a very useful feature to make tools that are bundled in one module to reduce the module clutter findable. -
module spiderwith the name of a package will show all versions of that package installed on the system. This is also case-insensitive. Let's try for instancemodule spider gnuplot. This will show 10 versions of GNUplot. There are two installations of GNUplot 5.4.2 and eight of 5.4.3. The remainder of the name shows us with what compilers gnuplot was compiled. The reason to have versions for two or three compilers is that no two compiler modules can be loaded simultaneously, and this offers a solution to use multiple tools without having to rebuild your environment for every tool, and hence also to combine tools.Now try
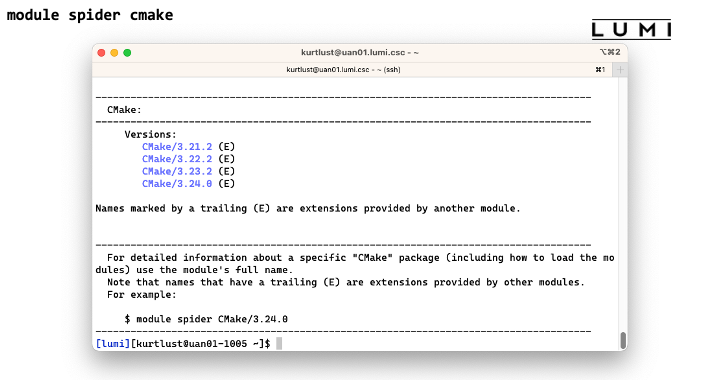
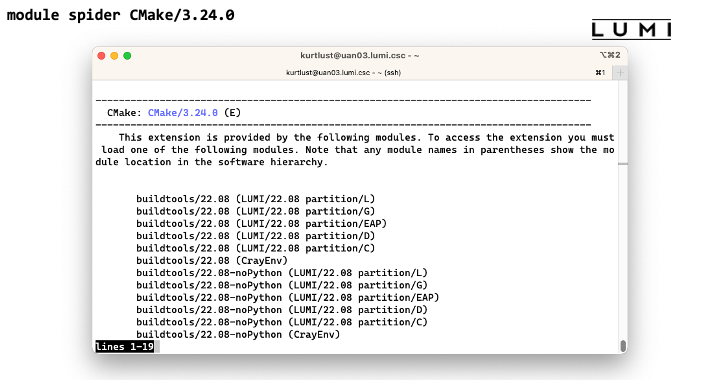
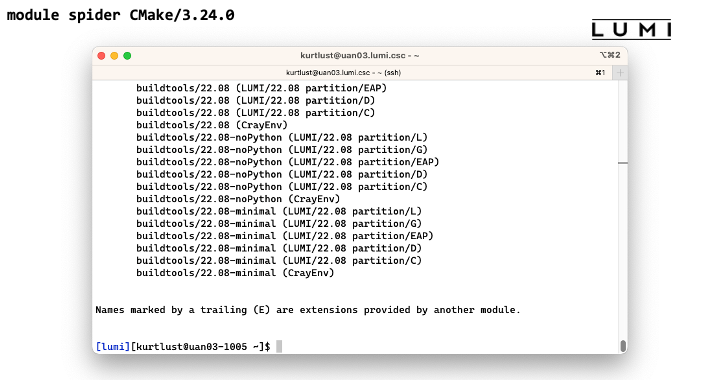
module spider CMake. We see that there are four versions, 3.21.2, 3.22.2, 3.23.2 and 3.24.0, but now they are shown in blue with an "E" behind the name. That is because there is no module calledCMakeon LUMI. Instead the tool is provided by another module that in this case contains a collection of popular build tools and that we will discover shortly. -
The third use of
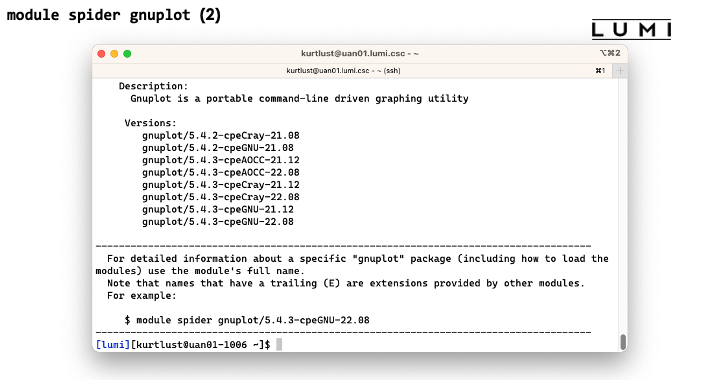
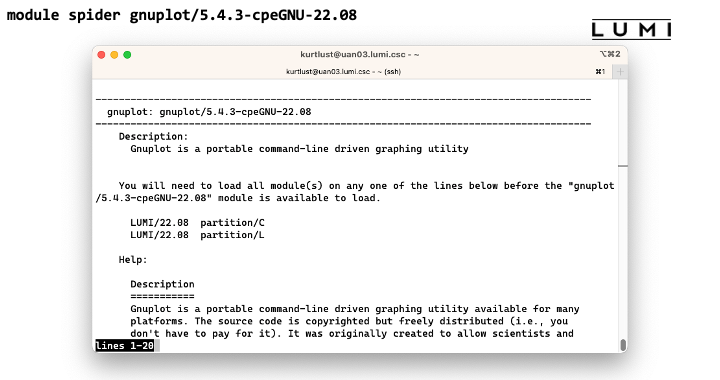
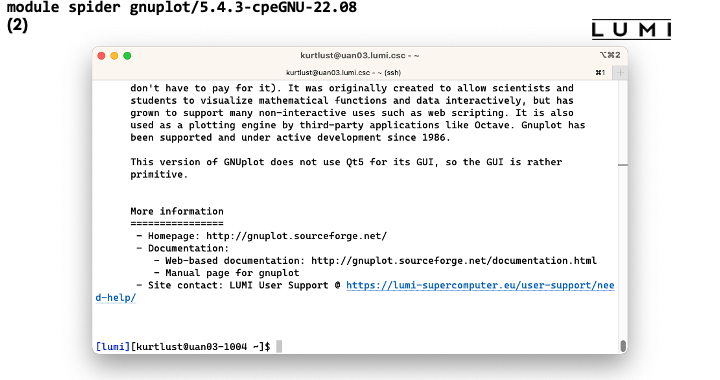
module spideris with the full name of a module. Try for instancemodule spider gnuplot/5.4.3-cpeGNU-22.08. This will now show full help information for the specific module, including what should be done to make the module available. For this GNUplot module we see that there are two ways to load the module: By loadingLUMI/22.08combined withpartition/Cor by loadingLUMI/22.08combined withpartition/L. So use only a single line, but chose it in function of the other modules that you will also need. In this case it means that that version of GNUplot is available in theLUMI/22.08stack which we could already have guessed from its name, with binaries for the login and large memory nodes and the LUMI-C compute partition. This does however not always work with the Cray Programming Environment modules.We can also use
module spiderwith the name and version of an extension. So trymodule spider CMake/3.24.0. This will now show us that this tool is in thebuildtools/22.08module (among others) and give us 6 different options to load that module as it is provided in theCrayEnvand theLUMI/22.08software stacks and for all partitions (basically because we don't do processor-specific optimisations for these tools).
Demo module spider
Try the following commands:
module spider
module spider gnuplot
module spider cmake
module spider gnuplot/5.4.3-cpeGNU-22.08
module spider CMake/3.24.0
Module keyword command
module keyword will search for a module using a keyword but it is currently not very useful on
LUMI because of a bug in the current version of Cray Lmod which is solved in the more recent versions.
Currently the output contains a lot of irrelevant modules, basically all extensions of modules
on the system.
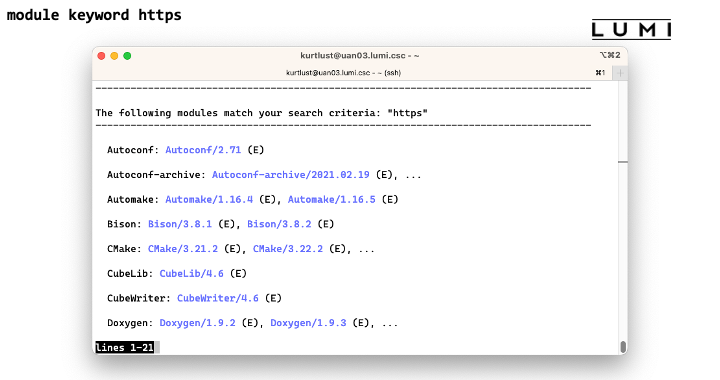
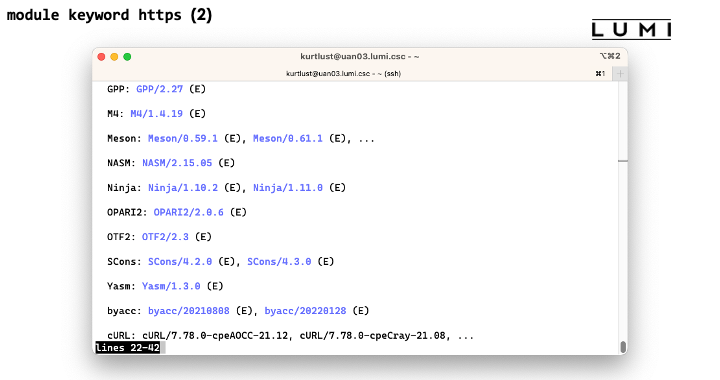
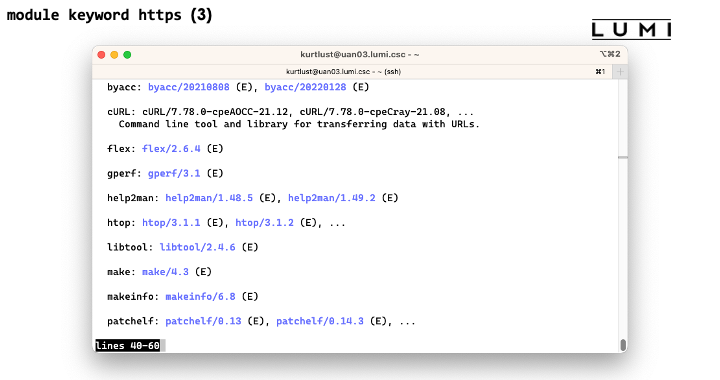
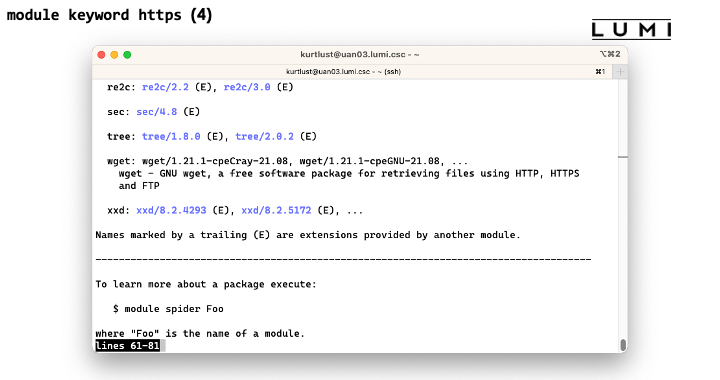
What module keyword really does is search in the module description and help for the word that
you give as an argument. Try for instance module keyword https and you'll see two relevant tools,
cURL and wget, two tools that can be used to download files to LUMI via several protocols in use
on the internet.
On LUMI we do try to put enough information in the module files to make this a suitable additional way to discover software that is already installed on the system, more so than in regular EasyBuild installations.
Demo module keyword
Try the following command:
module keyword https
Sticky modules and module purge
You may have been taught that module purge is a command that unloads all modules and on some
systems they might tell you in trainings not to use it because it may also remove some basic
modules that you need to use the system. On LUMI for instance there is an init-lumi module that
does some of the setup of the module system and should be reloaded after a normal module purge.
On Cray systems module purge will also unload the target modules while those are typically not
loaded by the PrgEnv modules so you'd need to reload them by hand before the PrgEnv modules
would work.
Lmod however does have the concept of "sticky modules". These are not unloaded by module purge
but are re-loaded, so unloaded and almost immediately loaded again, though you can always
force-unload them with module --force purge or module --force unload for individual modules.
Demo
Try the following command:
module av
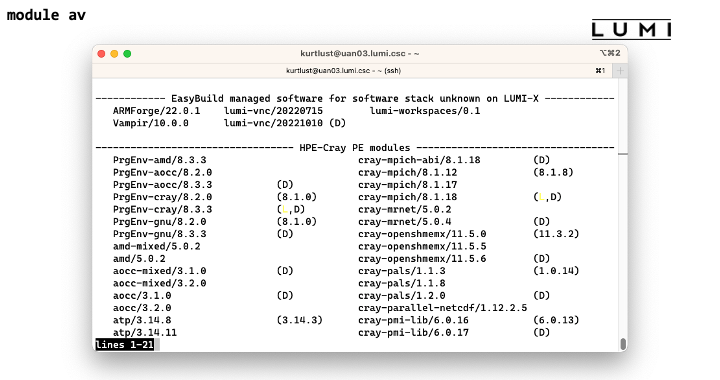
Note the very descriptive titles in the above screenshot.
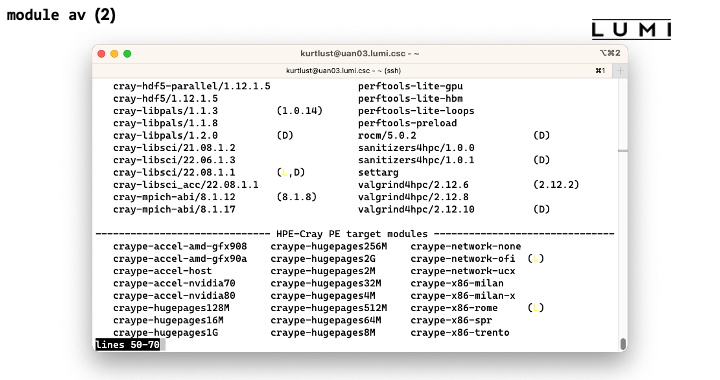
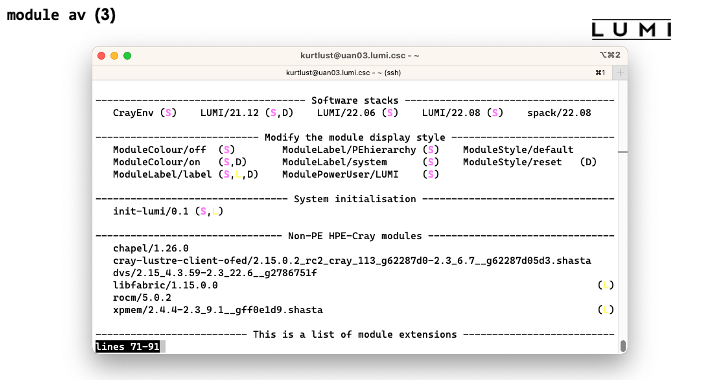

The letter "D" next to a name denotes that this is the default version, the letter "L" denotes that the module is loaded.
Try the following commands and carefully observe the output:
module load LUMI/22.08 buildtools
module list
module purge
module list
module --force unload ModuleLabel/label
module list
The sticky property has to be declared in the module file so we cannot add it to for instance the Cray Programming Environment target modules, but we can and do use it in some modules that we control ourselves. We use it on LUMI for the software stacks themselves and for the modules that set the display style of the modules.
- In the
CrayEnvenvironment,module purgewill clear the target modules also but asCrayEnvis not just left untouched but reloaded instead, the load ofCrayEnvwill load a suitable set of target modules for the node you're on again. But any customisations that you did for cross-compiling will be lost. - Similary in the LUMI stacks, as the
LUMImodule itself is reloaded, it will also reload a partition module. However, that partition module might not be the one that you had loaded but it will be the one that the LUMI module deems the best for the node you're on, and you may see some confusing messages that look like an error message but are not.
Changing how the module list is displayed
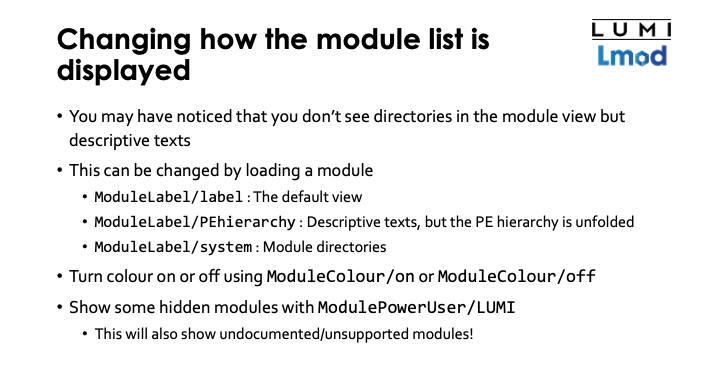
You may have noticed already that by default you don't see the directories in which the module
files reside as is the case on many other clusters. Instead we try to show labels that tell you
what that group of modules actually is. And sometimes this also combines modules from multiple
directories that have the same purpose. For instance, in the default view we collapse all modules
from the Cray Programming Environment in two categories, the target modules and other programming
environment modules. But you can customise this by loading one of the ModuleLabel modules.
One version, the label version, is the default view. But we also have PEhierarchy which
still provides descriptive texts but unfolds the whole hierarchy in the Cray Programming
Environment. And the third style is called system which shows you again the module directories.
Demo
Try the following commands:
module list
module avail
module load ModuleLabel/PEhiererachy
module avail
module load ModuleLabel/system
module avail
module load ModuleLabel/label
We're also very much aware that the default colour view is not good for everybody. So far we are not
aware of an easy way to provide various colour schemes as one that is OK for people who like a black
background on their monitor might not be OK for people who prefer a white background. But it is possible
to turn colour off alltogether by loading the ModuleColour/off module, and you can always turn it
on again with ModuleColour/on.
Demo
Try the following commands:
module avail
module load ModuleColour/off
module avail
module list
module load ModuleColour/on
We also hide some modules from regular users because we think they are not useful at all for regular
users or not useful in the context you're in at the moment. For instance, when working in the LUMI/22.08
stack we prefer that users use the Cray programming environment modules that come with release 22.08 of that
environment, and cannot guarantee compatibility of other modules with already installed software, so
we hide the other ones from view.
You can still load them if you know they exist but
you cannot see them with module available. It is possible though to still show most if not all of
them by loading ModulePowerUser/LUMI. Use this at your own risk however, we will not help you to make
things work or to use any module that was designed for us to maintain the system.
Demo
Try the following commands:
module load LUMI/22.08
module avail
module load ModulePowerUser
module avail
Note that we see a lot more Cray PE modules with ModulePowerUser!
EasyBuild to extend the LUMI software stack
Installing software on HPC systems
Software on HPC systems is rarely installed from RPMs for various reasons. Generic RPMs are rarely optimised for the specific CPU of the system as they have to work on a range of systems and as including optimised code paths in a single executable for multiple architectures is hard to even impossible. Secondly generic RPMs might not even work with the specific LUMI environment. They may not fully support the SlingShot interconnect and hence run at reduced speed, or they may need particular kernel modules or daemons that are not present on the system or they may not work well with the resource manager on the system. We expect this to happen especially with packages that require specific MPI versions. Moreover, LUMI is a multi-user system so there is usually no "one version fits all". And we need a small system image as nodes are diskless which means that RPMs need to be relocatable so that they can be installed elsewhere.
Spack and EasyBuild are the two most popular HPC-specific software build and installation frameworks. These two systems usually install packages from sources so that the software can be adapted to the underlying hardware and operating system. They do offer a mean to communicate and execute installation instructions easily so that in practice once a package is well supported by these tools a regular user can install them also. Both packages make software available via modules so that you can customise your environment and select appropriate versions for your work. And they do take care of dependency handling in a way that is compatible with modules.
Extending the LUMI stack with EasyBuild
On LUMI EasyBuild is our primary software installation tool. We selected this as there is already a lot of experience with EasyBuild in several LUMI consortium countries and as it is also a tool developed in Europe which makes it a nice fit with EuroHPC's goal of creating a fully European HPC ecosystem.
EasyBuild is fully integrated in the LUMI software stack. Loading the LUMI module will not only make centrally installed packages available, but also packages installed in your personal or project stack. Installing packages in that space is done by loading the EasyBuild-user module that will load a suitable version of EasyBuild and configure it for installation in a way that is compatible with the LUMI stack. EasyBuild will then use existing modules for dependencies if those are already on the system or in your personal or project stack.
Note however that the built-in easyconfig files that come with EasyBuild do not work on LUMI at the moment.
- For the GNU toolchain we would have problems with MPI. EasyBuild there uses Open MPI and that needs to be configured differently to work well on LUMI, and there are also still issues with getting it to collaborate with the resource manager as it is installed on LUMI.
- The Intel-based toolchains have their problems also. At the moment, the Intel compilers with the
AMD CPUs are a problematic cocktail. There have recently been performance and correctness problems
with the MKL math library and also failures some versions of Intel MPI,
and you need to be careful selecting compiler options and not use
-xHostwith the classic compilers or the Intel compiler will simply optimize for a two decades old CPU.
Instead we make our own EasyBuild build recipes that we also make available in the LUMI-EasyBuild-contrib GitHub repository. The EasyBuild configuration done by the EasyBuild-user module will find a copy of that repository on the system or in your own install directory. The latter is useful if you always want the very latest, before we deploy it on the system. We also maintain a list of all EasyBuild recipes installed in the central stack maintained by LUST or available in the main EasyConfig repository LUMI-EasyBuild-contrib in the LUMI Software Library.
Step 1: Where to install
Let's now discuss how you can extend the central LUMI software stack with packages that you need for your project.
The default location for the EasyBuild user modules and software is in $HOME/EasyBuild. This is not
the ideal place though as then the software is not available for other users in your project, and
as the size of your home directory is also limited and cannot be expanded. The home file system on LUMI
is simply not meant to install software. However, as LUMI users can have multiple projects there is no
easy way to figure out automatically where else to install software.
The best place to install software is in your project directory so that it also becomes available
for the whole project. After all, a project is meant to be a collaboration between all participants
on a scientific problem. You'll need to point LUMI to the right location though and that has to
be done by setting the environment variable EBU_USER_PREFIX to point to the location where you
want to have your custom installation. Also don't forget to export that variable as otherwise the
module system and EasyBuild will not find it when they need it. So a good choice would be
something like
export EBU_USER_PREFIX=/project/project_465000000/EasyBuild.
You have to do this before loading the LUMI module as it is then already used to ensure that
user modules are included in the module search path. You can do this in your .bash_profile or
.bashrc.
This variable is not only used by EasyBuild-user to know where to install software, but also
by the LUMI - or actually the partition - module to find software so all users in your project
who want to use the software should set that variable.
Step 2: Configure the environment
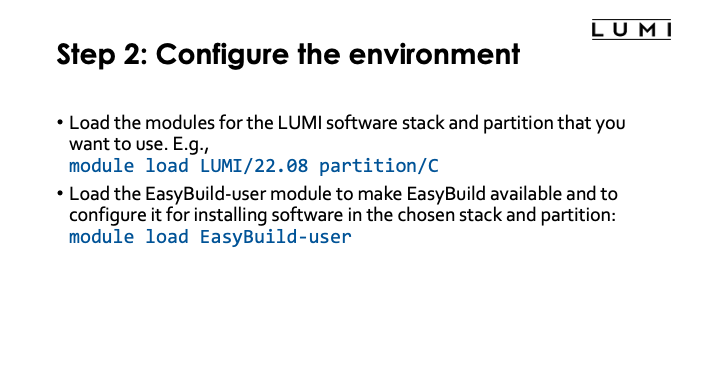
Once that environment variable is set, all you need to do to activate EasyBuild is to load
the LUMI module, load a partition module if you want a different one from the default, and
then load the EasyBuild-user module. In fact, if you switch to a different partition
or LUMI module after loading EasyBuild-user EasyBuild will still be correctly reconfigured
for the new stack and new partition.
Cross-compilation which is installing software for a different partition than the one you're
working on does not always work since there is so much software around with installation scripts
that don't follow good practices, but when it works it is easy to do on LUMI by simply loading
a different partition module than the one that is auto-loaded by the LUMI module.
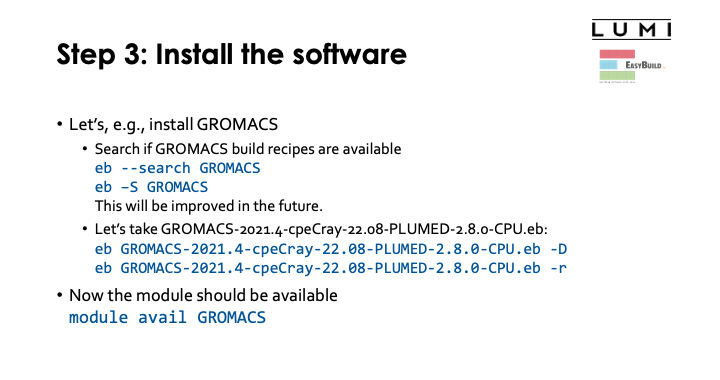
Step 3: Install the software.
Demo moment 2
Let's look at GROMACS as an example. I will not try to do this completely live though as the
installation takes 15 or 20 minutes.
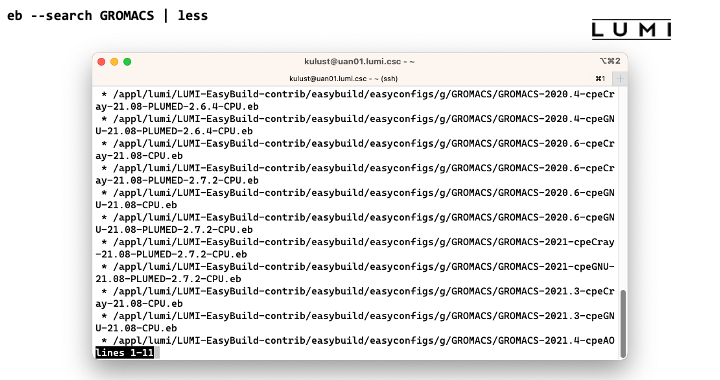
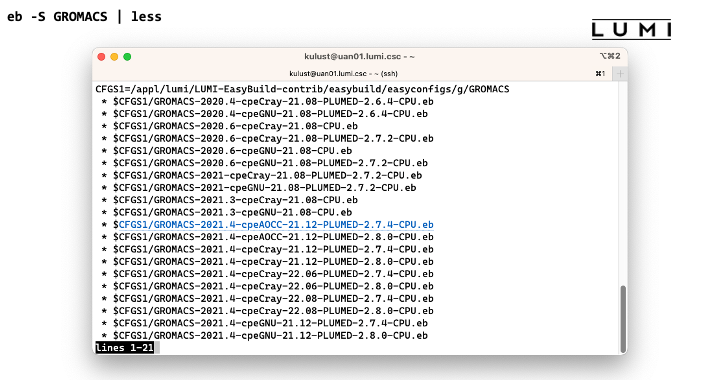
First we need to figure out for which versions of GROMACS we already have support.
At the moment we have to use eb -S or eb --search for that. So in our example this is
eb --search GROMACS
Now let's take the variant GROMACS-2021.4-cpeCray-22.08-PLUMED-2.8.0-CPU.eb.
This is GROMACS 2021.4 with the PLUMED 2.8.0 plugin, build with the Cray compilers
from LUMI/22.08, and a build meant for CPU-only systems. The -CPU extension is not
always added for CPU-only system, but in case of GROMACS we do expect that GPU builds for
LUMI will become available early on in the deployment of LUMI-G so we've already added
a so-called version suffix to distinguish between CPU and GPU versions.
To install it, we first run
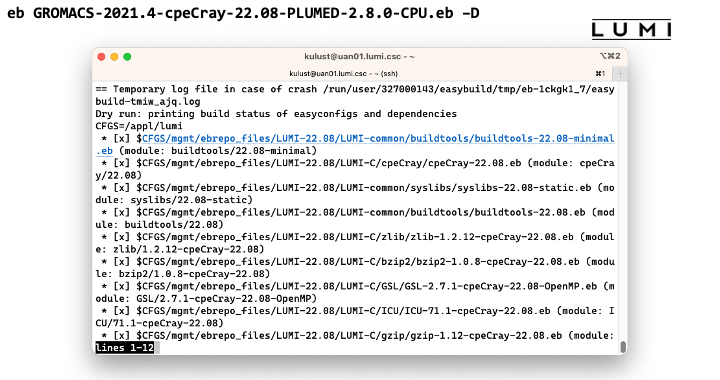
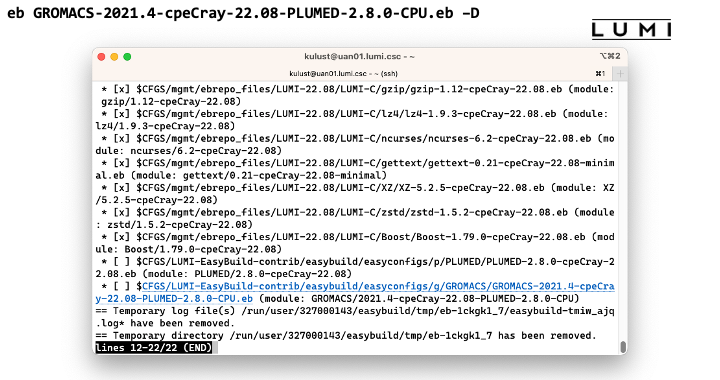
eb GROMACS-2021.4-cpeCray-22.08-PLUMED-2.8.0-CPU.eb –D
-D flag tells EasyBuild to just perform a check for the dependencies that are needed
when installing this package, while the -r argument is needed to tell EasyBuild to also
look for dependencies in a preset search path. The search for dependencies is not automatic
since there are scenarios where this is not desired and it cannot be turned off as easily as
it can be turned on.
Looking at the output we see that EasyBuild will also need to install PLUMED for us.
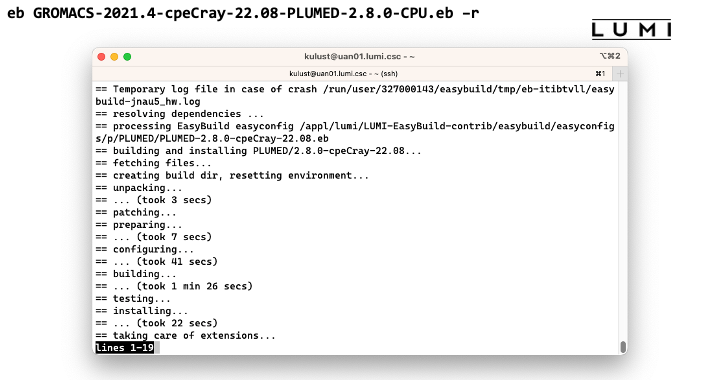
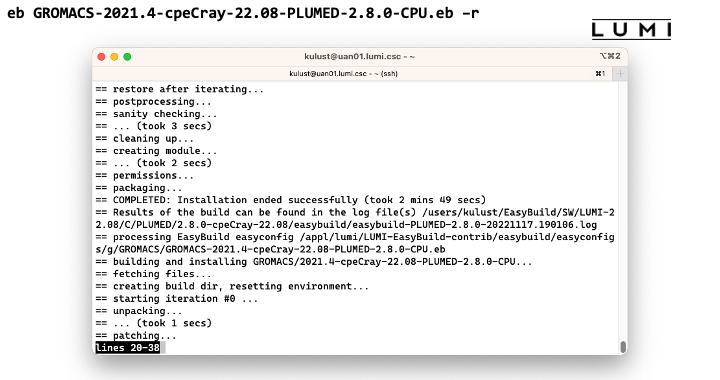
But it will do so automatically when we run
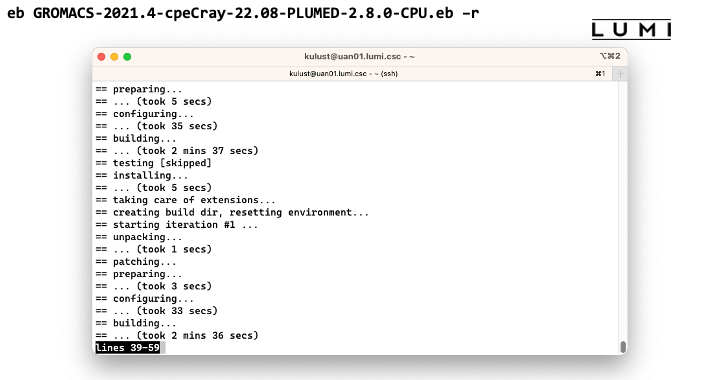
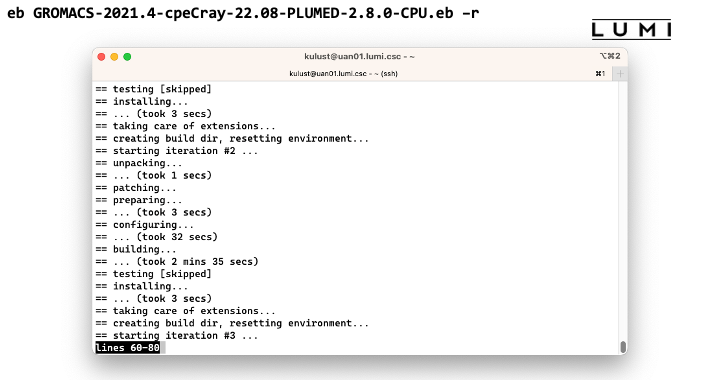
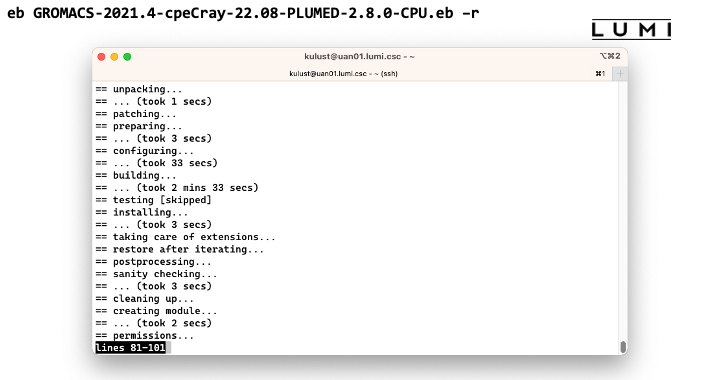
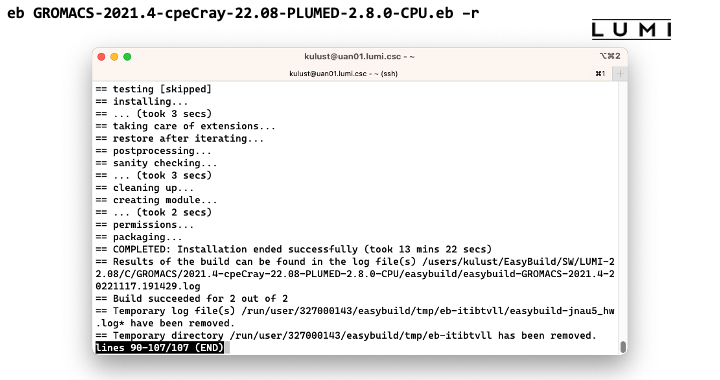
eb GROMACS-2021.4-cpeCray-22.08-PLUMED-2.8.0-CPU.eb -r
This takes too long to wait for, but once it finished the software should be available and you should be able to see the module in the output of
module avail
Demo of the EasyBuild installation of GROMACS
End of demo moment 2
Step 3: Install the software - Note
There is a little problem though that you may run into. Sometimes the module does not
show up immediately. This is because Lmod keeps a cache when it feels that Lmod searches
become too slow and often fails to detect that the cache is outdated.
The easy solution is then to simply remove the cache which is in $HOME/.lmod.d/.cache,
which you can do with
rm -rf $HOME/.lmod.d/.cache
Installing software this way is 100% equivalent to an installation in the central software
tree. The application is compiled in exactly the same way as we would do and served from the
same file systems. But it helps keep the output of module avail reasonably short and focused
on your projects, and it puts you in control of installing updates. For instance, we may find out
that something in a module does not work for some users and that it needs to be re-installed.
Do this in the central stack and either you have to chose a different name or risk breaking running
jobs as the software would become unavailable during the re-installation and also jobs may get
confused if they all of a sudden find different binaries. However, have this in your own stack
extension and you can update whenever it suits your project best or even not update at all if
you figure out that the problem we discovered has no influence on your work. OFten you also don't need
to be an EasyBuild expert to adapt the build recipe to install, e.g., a slgithly different version
of the package that better suits your needs.
More advanced work
You can also install some EasyBuild recipes that you got from support. For this it is best to create a subdirectory where you put those files, then go into that directory and run something like
eb my_recipe.eb -r .
-r is very important here as it does tell EasyBuild to also look for
dependencies in the current directory, the directory where you have put the recipes you got from
support, but also in its subdirectories so for speed reasons you should not do this just in your
home directory but in a subdirectory that only contains those files.
In some cases you will have to download sources by hand as packages don't allow to download software unless you sign in to their web site first. This is the case for a lot of licensed software, for instance, for VASP. We'd likely be in violation of the license if we would put the download somewhere where EasyBuild can find it, and it is also a way for us to ensure that you have a license for VASP. For instance,
eb --search VASP
eb VASP-6.3.2-cpeGNU-22.08.eb -r .
More advanced work (2): Repositories
It is also possible to have your own clone of the LUMI-EasyBuild-contrib GitHub repository
in your $EBU_USER_PREFIX subdirectory if you want the latest and greates before it is in
the centrally maintained clone of the repository. All you need to do is
cd $EBU_USER_PREFIX
git clone https://github.com/Lumi-supercomputer/LUMI-EasyBuild-contrib.git
And it is even possible to maintain your own GitHub repository.
The only restrictions are that it should also be in $EBU_USER_PREFIX and that
the subdirectory should be called UserRepo, but that doesn't stop you from using
a different name for the repository on GitHub. After cloning your GitHub version you
can always change the name of the directory.
The structure should also be compatible with the structure that EasyBuild uses, so
easyconfig files go in $EBU_USER_PREFIX/easybuild/easyconfigs.
More advanced work (3): Reproducibility
EasyBuild also takes care of a high level of reproducibility of installations.
It will keep a copy of all the downloaded sources in the $EBU_USER_PREFIX/sources
subdirectory, and use that source file again rather than downloading it again. Of course
in some cases those "sources" could be downloaded tar files with binaries instead
as EasyBuild can install downloaded binaries or relocatable RPMs.
And if you know the structure of those directories, this is also a place where
you could manually put the downloaded installation files for licensed software.
Also, there are rare cases in which EasyBuild cannot save the sources because
they are automatically downloaded during the installation procedure outside the control
of EasyBuild with no way to teach EasyBuild where to download those files and place them to
avoid them to be downloaded automatically. This is, e.g., often te case for software written
in Rust.
Moreover, EasyBuild also keeps copies of all installed easconfig files in two locations.
- There is a copy in
$EBU_USER_PREFIX/ebrepo_files. And in fact, EasyBuild will use this version first if you try to re-install and did not delete this version first. This is also a policy we set on LUMI which has both its advantages and disadvantages. The advantage is that it ensures that the information that EasyBuild has about the installed application is compatible with what is in the module files. But the disadvantage of course is that if you install an EasyConfig file without being in the subdirectory that contains that file, it is easily overlooked that it is installing based on the EasyConfig in theebrepo_filessubdirectory and not based on the version of the recipe that you likely changed and is in your user repository or one of the other repositories that EasyBuild uses. - The second copy is with the installed software in
$EBU_USER_PREFIX/SWin a subdirectory calledeasybuild. This subdirectory is meant to have all information about how EasyBuild installed the application, also some other files that play a role in the installation process, and hence to help in reproducing an installation or checking what's in an existing installation. It is also the directory where you will find the extensive log file with all commands executed during the installation and their output.
EasyBuild training for advanced users and developers
Since there were a lot of registrations from local support team members, I want to dedicate one slide to them also.
Pointers to all information about EasyBuild can be found on the EasyBuild web site easybuild.io. This page also includes links to training materials, both written and as recordings on YouTube, and the EasyBuild documentation.
Generic EasyBuild training materials are available on easybuilders.github.io/easybuild-tutorial. The site also contains a LUST-specific tutorial oriented towards Cray systems.
In the past we also organised a training for CSC staff and staff from other local support organisations. The latest version of the training materials is currently available on klust.github.io/easybuild-tutorial.
Containers on LUMI
Let's now switch to using containers on LUMI. This section is about using containers on the login nodes and compute nodes. Some of you may have heard that there were plans to also have an OpenShift Kubernetes container cloud platform for running microservices but at this point it is not clear if and when this will materialize due to a lack of manpower to get this running and then to support this.
In this section, we will
-
discuss what to expect from containers on LUMI: what can they do and what can't they do,
-
discuss how to get a container on LUMI,
-
discuss how to run a container on LUMI,
-
and discuss some enhancements we made to the LUMI environment that are based on containers or help you use containers.
Remember though that the compute nodes of LUMI are an HPC infrastructure and not a container cloud!
What do containers not provide
What is being discussed in this subsection may be a bit surprising. Containers are often marketed as a way to provide reproducible science and as an easy way to transfer software from one machine to another machine. However, containers are neither of those and this becomes very clear when using containers build on your typical Mellanox/NVIDIA InfiniBand based clusters with Intel processors and NVIDIA GPUs on LUMI.
First, computational results are almost never 100% reproducible because of the very nature of how computers work. You can only expect reproducibility of sequential codes between equal hardware. As soon as you change the CPU type, some floating point computations may produce slightly different results, and as soon as you go parallel this may even be the case between two runs on exactly the same hardware and software.
But full portability is a much greater myth. Containers are really only guaranteed to be portable between similar systems. They may be a little bit more portable than just a binary as you may be able to deal with missing or different libraries in the container, but that is where it stops. Containers are usually build for a particular CPU architecture and GPU architecture, two elements where everybody can easily see that if you change this, the container will not run. But there is in fact more: containers talk to other hardware to, and on an HPC system the first piece of hardware that comes to mind is the interconnect. And they use the kernel of the host and the kernel modules and drivers provided by that kernel. Those can be a problem. A container that is not build to support the SlingShot interconnect, may fall back to TCP sockets in MPI, completely killing scalability. Containers that expect the knem kernel extension for good intra-node MPI performance may not run as efficiently as LUMI uses xpmem instead.
Even if a container is portable to LUMI, it may not yet be performance portable. E.g., without proper support for the interconnect it may still run but in a much slower mode. But one should also realise that speed gains in the x86 family over the years come to a large extent from adding new instructions to the CPU set, and that two processors with the same instructions set extensions may still benefit from different optimisations by the compilers. Not using the proper instruction set extensions can have a lot of influence. At my local site we've seen GROMACS doubling its speed by choosing proper options, and the difference can even be bigger.
Many HPC sites try to build software as much as possible from sources to exploit the available hardware as much as possible. You may not care much about 10% or 20% performance difference on your PC, but 20% on a 160 million EURO investment represents 32 million EURO and a lot of science can be done for that money...
But what can they then do on LUMI?
-
A very important reason to use containers on LUMI is reducing the pressure on the file system by software that accesses many thousands of small files (Python and R users, you know who we are talking about). That software kills the metadata servers of almost any parallel file system when used at scale.
As a container on LUMI is a single file, the metadata servers of the parallel file system have far less work to do, and all the file caching mechanisms can also work much better.
-
When setting up very large software environments, e.g., some Python and R environments, they can still be very helpful, even if you may have to change some elements in your build recipes from your regular cluster or workstation. Some software may also be simply too hard to install from sources in the typical HPC way of working.
-
And related to the previous point is also that some software may not even be suited for installation in a multi-user HPC system. HPC systems want a lightweight
/usretc. structure as that part of the system software is often stored in a RAM disk, and to reduce boot times. Moreover, different users may need different versions of a software library so it cannot be installed in its default location in the system library. However, some software is ill-behaved and doesn't allowed to be relocated to a different directory, and in these cases containers help you to build a private installation that does not interfere with other software on the system.
Remember though that whenever you use containers, you are the system administrator and not LUST. We can impossibly support all different software that users want to run in containers, and all possible Linux distributions they may want to run in those containers. We provide some advice on how to build a proper container, but if you chose to neglect it it is up to you to solve the problems that occur.
Managing containers
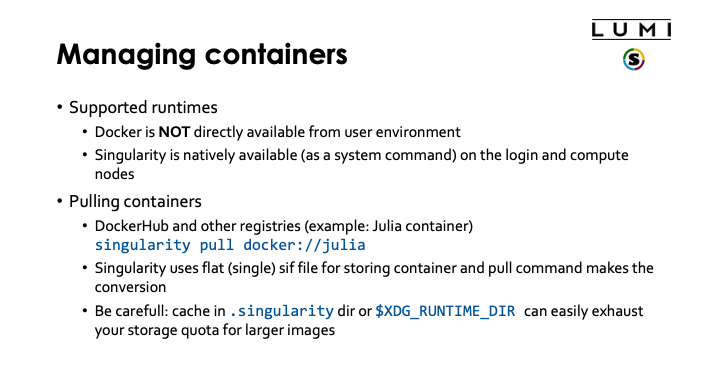
On LUMI, we currently support only one container runtime.
Docker is not available, and will never be on the regular compute nodes as it requires elevated privileges to run the container which cannot be given safely to regular users of the system.
Singularity is currently the only supported container runtime and is available on the login nodes and the compute nodes. It is a system command that is installed with the OS, so no module has to be loaded to enable it. We can also offer only a single version of singularity or its close cousin AppTainer as singularity/AppTainer simply don't support running multiple versions, and currently the version that we offer is determined by what is offered by the OS.
To work with containers on LUMI you will either need to pull the container from a container registry,
e.g., DockerHub, or bring in the container by copying the singularity .sif file.
Singularity does offer a command to pull in a Docker container and to convert it to singularity format. E.g., to pull a container for the Julia language from DockerHub, you'd use
singularity pull docker://julia
Singularity uses a single flat sif file for storing containers. The singularity pull command does the
conversion from Docker format to the singularity format.
Singularity caches files during pull operations and that may leave a mess of files in
the .singularity cache directory or in $XDG_RUNTIME_DIR (works only on the login nodes).
The former can lead to exhaustion of your
storage quota, so check and clean up from time to time. You may also want to clean up $XDG_RUNTIME_DIR,
but this directory is also automatically cleaned when you log out from your last running session on that
(login) node.
Demo singularity pull
Let's try the singularity pull docker://julia command:
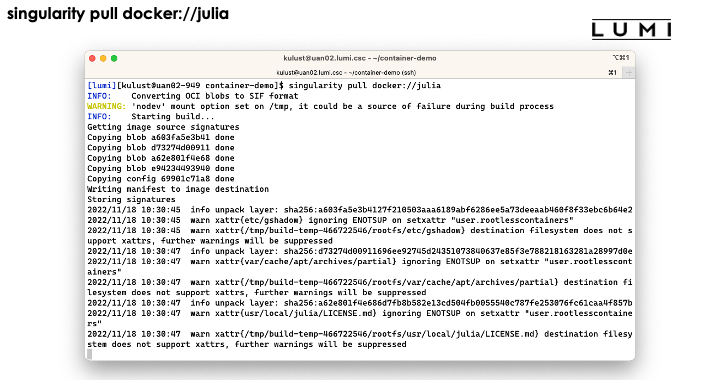
We do get a lot of warnings but usually this is perfectly normal and usually they can be safely ignored.
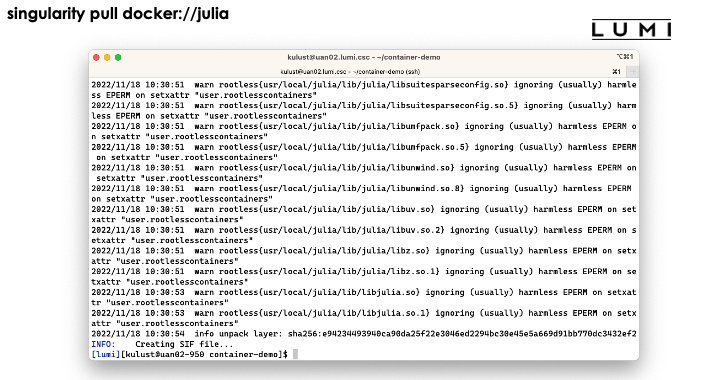
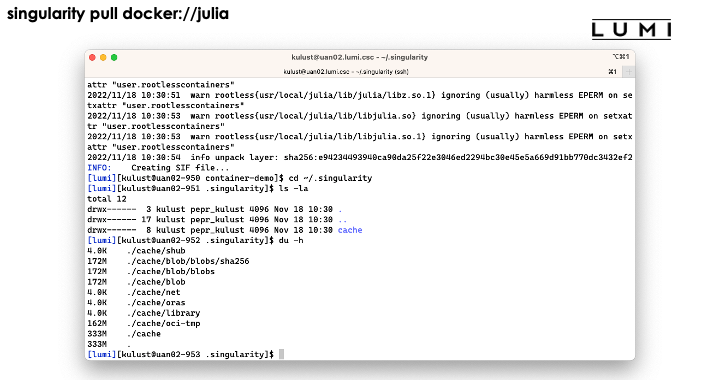
The process ends with the creation of the file jula_latest.sif.
Note however that the process has left a considerable number of files in ~/.singularity also:
There is currently no support for building containers on LUMI and I do not expect that to change quickly. It would require enabling some features in the Linux kernel that have seen some very serious security vulnerabilities in recent years.
So you should pull containers from a container repository, or build the container on your own workstation and then transfer it to LUMI.
We are also working on a number of base images to build upon, where the base images are tested with the OS kernel on LUMI.
Interacting with containers
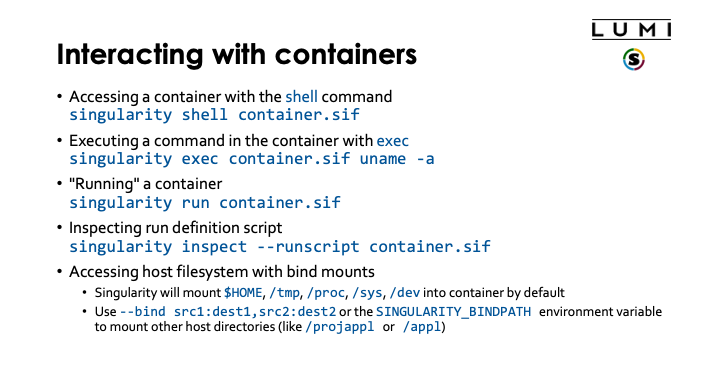
There are basically three ways to interact with containers.
If you have the sif file already on the system you can enter the container with an interactive shell:
singularity shell container.sif
Demo singularity shell
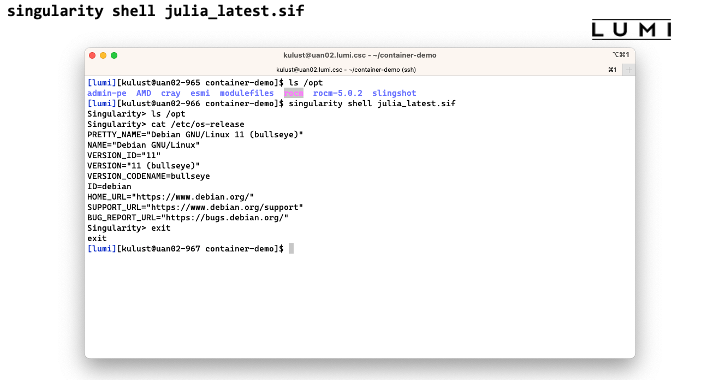
In this screenshot we checked the contents of the /opt directory before and after the
singularity shell julia_latest.sif command. This shows that we are clearly in a different
environment. Checking the /etc/os-release file only confirms this as LUMI runs SUSE Linux
on the login nodes, not a version of Debian.
The second way is to execute a command in the container with singularity exec. E.g., assuming the
container has the uname executable installed in it,
singularity exec container.sif uname -a
Demo singularity exec
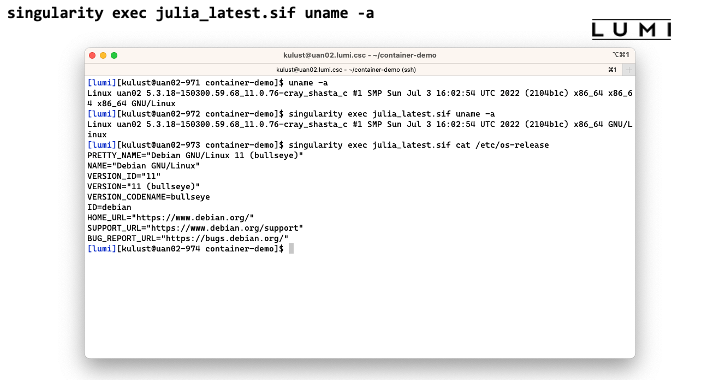
In this screenshot we execute the uname -a command before and with the
singularity exec julia_latest.sif command. There are some slight differences in the
output though the same kernel version is reported as the container uses the host kernel.
Executing
singularity exec julia_latest.sif cat /etc/os-release
confirms though that the commands are executed in the container.
The third option is often called running a container, which is done with singularity run:
singularity run container.sif
It does require the container to have a special script that tells singularity what
running a container means. You can check if it is present and what it does with singularity inspect:
singularity inspect --runscript container.sif
Demo singularity run
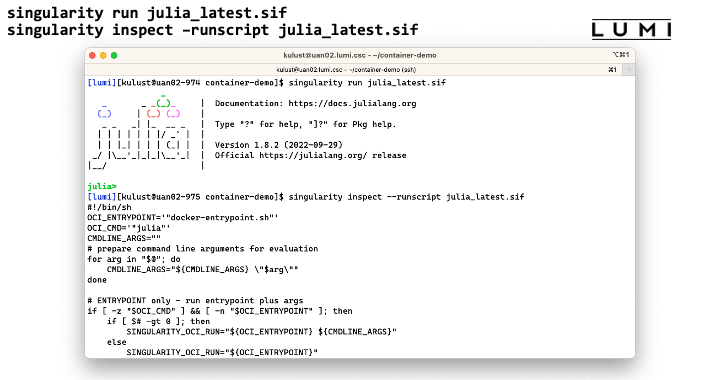
In this screenshot we start the julia interface in the container using
singularity run. The second command shows that the contianer indeed
includes a script to tell singularity what singularity run should do.
You want your container to be able to interact with the files in your account on the system.
Singularity will automatically mount $HOME, /tmp, /proc, /sys and dev in the container,
but this is not enough as your home directory on LUMI is small and only meant to be used for
storing program settings, etc., and not as your main work directory. (And it is also not billed
and therefore no extension is allowed.) Most of the time you want to be able to access files in
your project directories in /project, /scratch or /flash, or maybe even in /appl.
To do this you need to tell singularity to also mount these directories in the container,
either using the
--bind src1:dest1,src2:dest2
flag or via the SINGULARITY_BIND or SINGULARITY_BINDPATH environment variables.
Running containers on LUMI
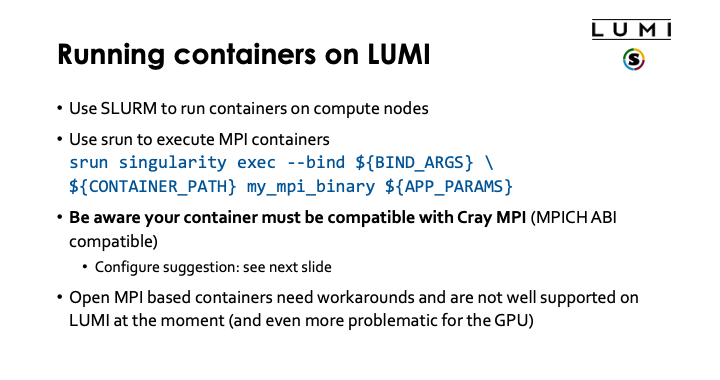
Just as for other jobs, you need to use Slurm to run containers on the compute nodes.
For MPI containers one should use srun to run the singularity exec command, e.g,,
srun singularity exec --bind ${BIND_ARGS} \
${CONTAINER_PATH} mp_mpi_binary ${APP_PARAMS}
(and replace the environment variables above with the proper bind arguments for --bind, container file and
parameters for the command that you want to run in the container).
On LUMI, the software that you run in the container should be compatible with Cray MPICH, ie.e, use the MPICH ABI (currently Cray MPICH is based on MPICH 3.4). It is then possible to tell the container to use Cray MPICH (from outside the container) rather than the MPICH variant installed in the container, so that it can offer optimal performance on the LUMI SlingShot 11 interconnect.
Open MPI containers are currently not well supported on LUMI and we do not recommend using them. We have no good solutions at the moment to run them with good performance. We only have a partial solution for the CPU nodes, and on the GPU nodes Open MPI is very problematic at the moment. This is both due to some design issues in the design of Open MPI, and also to some piece of software that recent versions of Open MPI require but that HPE does not yet support on Cray EX systems. Open MPI has a slight preference for the UCX communication library over the OFI libraries, and currently full GPU support requires UCX. Moreover, binaries using Open MPI often use the so-called rpath linking process so that it becomes a lot harder to inject an Open MPI library that is installed elsewhere. The good news though is that the Open MPI developers of course also want Open MPI to work on biggest systems in the USA, and all three currently operating or planned exascale systems use the SlingShot 11 interconnect so work is going on for better support for OFI and for full GPU support on systems that rely on OFI and do not support UCX.
Enhancements to the environment
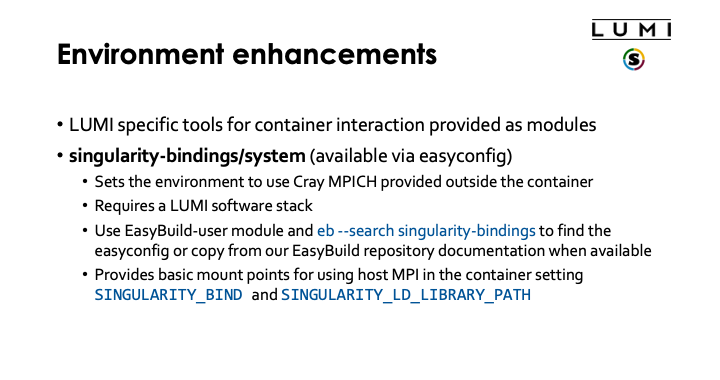
To make life easier, LUST with the support of CSC did implement some modules that are either based on containers or help you run software with containers.
The singularity-bindings/system module which can be installed via EasyBuild
helps to set SINGULARITY_BIND and SINGULARITY_LD_LIBRARY__PATH to use
Cray MPICH. Figuring out those settings is tricky, and sometimes changes to the
module are needed for a specific situation because of dependency conflicts
between Cray MPICH and other software in the container, which is why we don't
provide it in the standard software stacks but instead make it available as
an EasyBuild recipe that you can adapt to your situation and install.
As it needs to be installed through EasyBuild, it is really meant to be
used in the context of a LUMI software stack (so not in CrayEnv).
To find the EasyConfig files, load the EasyBuild-user module and
run
eb --search singularity-bindings
Soon you'll also be able to find more information on the design of this module and the contents of the EasyConfig files in the software library documentation that we are developing and that will be made available via the "Software" section in the LUMI documentation.
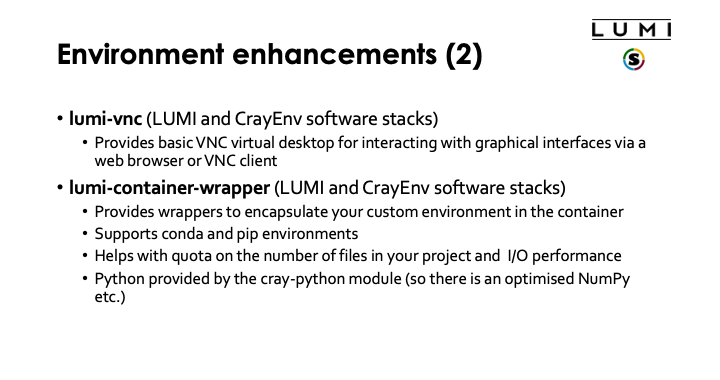
The second tool is a container that we provide with some bash functions
to start a VNC server as temporary way to be able to use some GUI programs
on LUMI until the final setup which will be based on Open OnDemand is ready.
It can be used in CrayEnv or in the LUMI stacks. The container also
contains a poor men's window manager (and yes, we know that there are sometimes
some problems with fonts). It is possible to connect to the VNC server either
through a regular VNC client on your PC or a web browser, but in both cases you'll
have to create an ssh tunnel to access the server. Try
module help lumi-vnc
for more information on how to use lumi-vnc.
The final tool is a container wrapper tool that users from Finland may also know
as Tykky. It is a tool to wrap Python and conda installations in a limited number
of files in a transparent way. On LUMI, it is provided by the lumi-container-wrapper
module which is available in the CrayEnv environment and in the LUMI software stacks.
It is also documented in the LUMI documentation.
The basic idea is that you run a tool to either do a conda installation or an installation
of Python packages from a file that defines the environment in either standard conda
format (a Yaml file) or in the requirements.txt format used by pip.
The container wrapper will then perform the installation in a work directory, create some
wrapper commands in the bin subdirectory of the directory where you tell the container
wrapper tool to do the installation, and it will use SquashFS to create as single file
that contains the conda or Python installation.
We do strongly recommend to use the container wrapper tool for larger conda and Python installation.
We will not raise your file quota if it is to house such installation in your /project directory.
Demo lumi-container-wrapper
Create a subdirectory to experiment. In that subdirectory, create a file named env.yml with
the content:
channels:
  - conda-forge
dependencies:
  - python=3.8.8
  - scipy
  - nglview
and create an empty subdirectory conda-cont-1.
|Now you can follow the commands on the slides below:
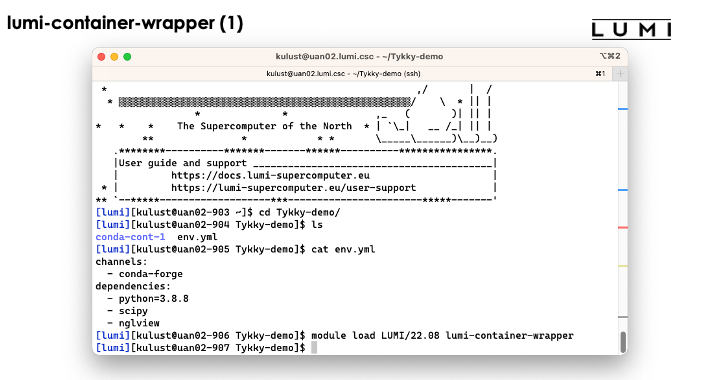
On the slide above we prepared the environment.
Now lets run the command
conda-containerize new --prefix ./conda-cont-1 env.yml
and look at the output that scrolls over the screen. The screenshots don't show the full output as some parts of the screen get overwritten during the process:
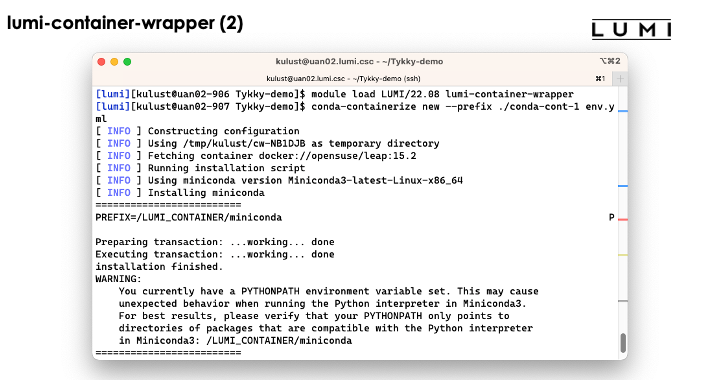
The tool will first build the conda installation in a temprorary work directory and also uses a base container for that purpose.
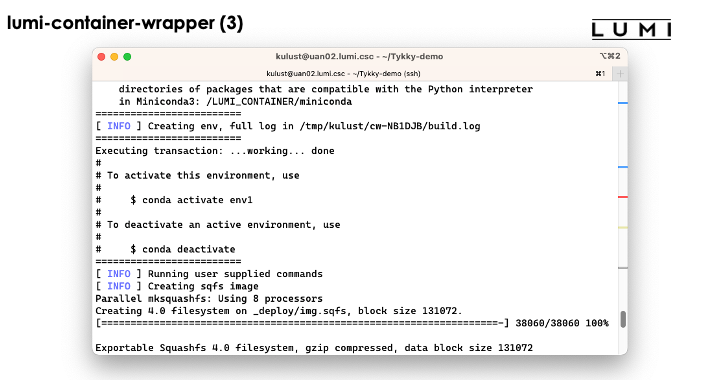

The conda installation itself though is stored in a SquashFS file that is then used by the container.
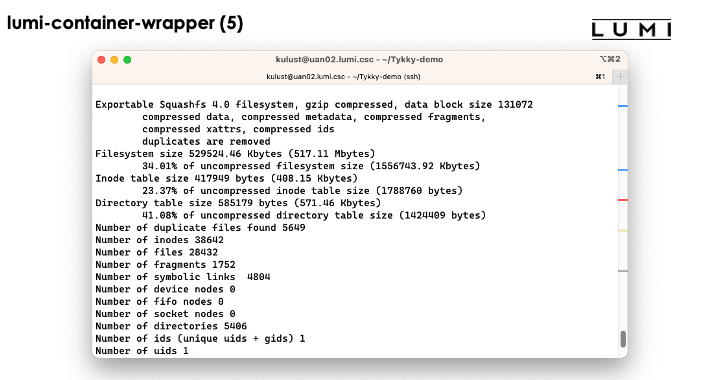
In the slide above we see the installation contains both a singularity container and a SquashFS file. They work together to get a working conda installation.
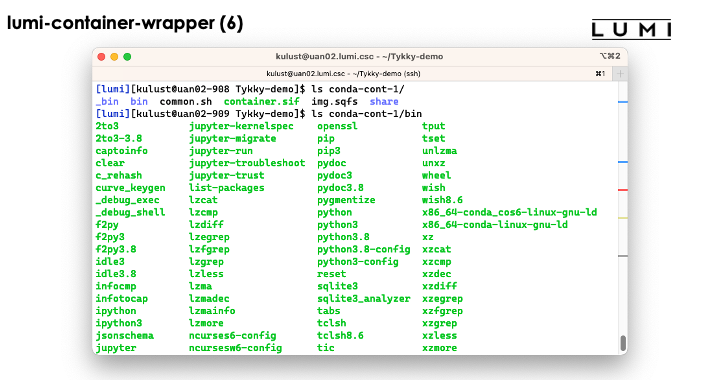
The bin directory seems to contain the commands, but these are in fact scripts
that run those commands in the container with the SquashFS file system mounted in it.
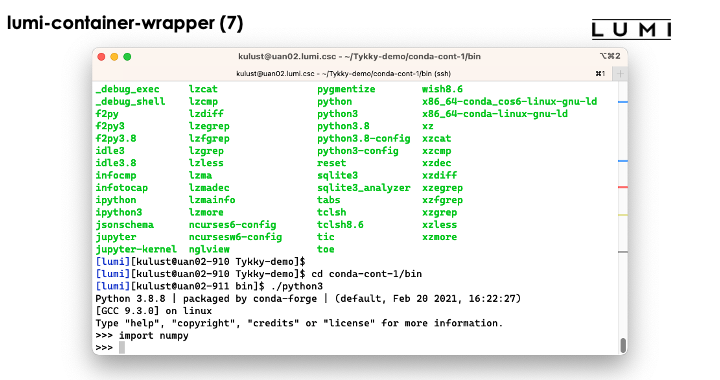
So as you can see above, we can simply use the python3 command without realising
what goes on behind the screen...
The wrapper module also offers a pip-based command to build upon the Cray Python modules already present on the system
Conclusion: Container limitations on LUMI-C
To conclude the information on using singularity containers on LUMI, we want to repeat the limitations:
-
Containers use the host's operating system kernel which is likely different and may have different drivers and kernel extensions than your regular system. This may cause the container to fail or run with poor performance.
-
The LUMI hardware is almost certainly different from that of the systems on which you may have used the container before and that may also cause problems.
In particular a generic container may not offer sufficiently good support for the SlingShot 11 interconnect on LUMI which requires OFI (libfabric) with the right network provider (the so-called Cassini provider) for optimal performance. The software in teh container may fall back to TCP sockets resulting in poor performance and scalability for communication-heavy programs.
For containers with an MPI implementation that follows the MPICH aBI the solution is often to tell it to use the Cray MPICH libraries fro the system instead.
-
Building containers is currently not supported on LUMI due to security concerns.